Starting with the pump, Corsair have done a good job of packaging this into a small block, only sitting above the CPU itself by about 35-40mm. However, a better job could be done for wiring the pump into the PC, with three separate connections on the right side and the Mini-USB on the left, it can create a bit of a mess once installed unless youre talented with cable routing and are lucky enough to have things placed conveniently.
The pump features a silver band around the top, surrounding the inner black inlay. The RGB lighting surrounds the silver edging, as well as illuminating the large Corsair logo.

The three cables protruding from the right of the pump are: SATA power, to ensure the pump and the pair of fans receive enough power to go about their duty. A pair of 4-pin PWM fan connectors, enabling the fans to be controlled directly from software and monitored closely. Theres also a 3-pin fan connector for the pump, making sure your motherboard knows theres something looking after your precious CPU.

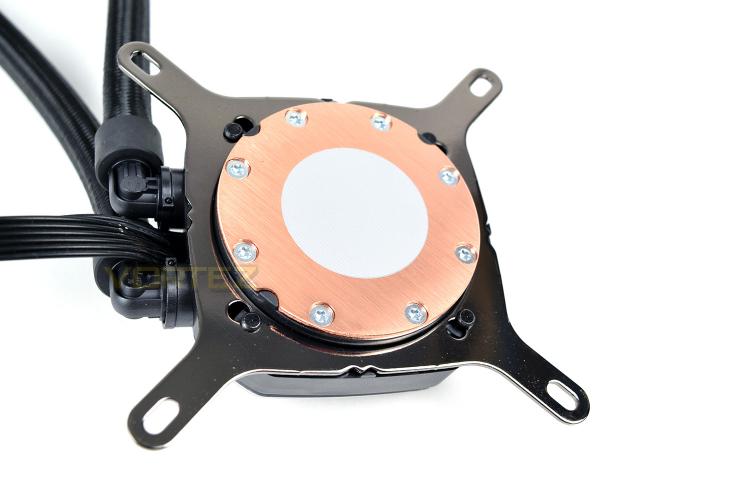
The underside of the pump, on the copper cooling plate, we find a pre-applied layer of thermal paste, allowing you to remove the plastic cap from this section and install it straight away, assuming your CPU is clean from any previous installations. You can also see the mechanism used to hold the mounting bracket in place, with a simple twist and lock system.
Theres nothing fancy about the radiator, its rectangular in shape and houses many, many fins; though Corsair do provide 16 fan screws, allowing you to install 120mm fans on either side for increased cooling, should it be required. The usual 8 stubby screws are also included for fixing it directly to the chassis.

The pump features a silver band around the top, surrounding the inner black inlay. The RGB lighting surrounds the silver edging, as well as illuminating the large Corsair logo.
The three cables protruding from the right of the pump are: SATA power, to ensure the pump and the pair of fans receive enough power to go about their duty. A pair of 4-pin PWM fan connectors, enabling the fans to be controlled directly from software and monitored closely. Theres also a 3-pin fan connector for the pump, making sure your motherboard knows theres something looking after your precious CPU.
The underside of the pump, on the copper cooling plate, we find a pre-applied layer of thermal paste, allowing you to remove the plastic cap from this section and install it straight away, assuming your CPU is clean from any previous installations. You can also see the mechanism used to hold the mounting bracket in place, with a simple twist and lock system.
Theres nothing fancy about the radiator, its rectangular in shape and houses many, many fins; though Corsair do provide 16 fan screws, allowing you to install 120mm fans on either side for increased cooling, should it be required. The usual 8 stubby screws are also included for fixing it directly to the chassis.


