
To start with, one of the strongest arrows in CORSAIR’s quiver was the ease of install; their mounting brackets, thumb screws, mounting screws, washers etc were always machined to an impeccable standard, usually much better than any competitor in the same price range, but that sadly seems to have changed, for whatever reason.
When we start our installation, the first thing we do is clean off any pre-applied paste and use Noctua’s NT-H1 thermal paste to ensure results are comparable across all of our tests.
We then bolt in the radiator to the top of the chassis, taking care to ensure we mount the fans in such a way that the 4-pin PWM cables are pointing towards the back of the case so they can be routed in the tidiest way possible.
Normally this would be easy and straight-forward but CORSAIR’s engineers seem to have dropped the ball here. The problem we faced was the ridiculous tightness of the screwholes, on both sides of the radiator. Screwing the fans into place required huge amounts of torque applied into screwheads, which for some reason CORSAIR have changed as well. This caused some skipping and jumping when trying to tighten everything up and has chewed the screwheads up slightly. I was honestly under the impression that I was doing something wrong, it was that tight; my right arm was killing me after doing up the 8 screws for the fans and the other 8 for the radiator mounting into the case.
Perhaps they’ve used a stronger aluminium to prevent the threads from getting chewed up if too much torque is applied to the screws, but this just felt wrong to us.
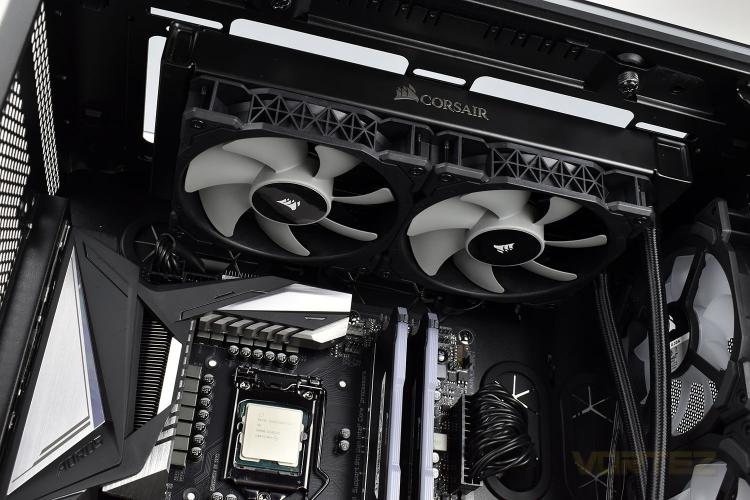
Next up, line up the backplate with the four holes in our LGA 1151 socket and screw in the correct mounting feet. These went in without a hitch and are still the correct size for our multi-bit screwdriver to tighten them up.

Now’s the time to install the pump enclosure. The Intel mounting plate is pre-installed when the cooler arrives but swapping them out for AM4 or TR4 is a doddle. The thumbscrews are easy to do up by hand, to about 70%, but then turning them with a screwdriver isn’t as easy as it should be. Previous iterations of the H-series coolers have used a deeper recess that’s allowed more torque to be applied, and limiting the amount that someone can tighten these isn’t exactly a bad idea but they’ve gone too far here, causing them to slip before they’re fully tightened.
Once that’s installed, doing up the cables behind the motherboard tray takes a couple of minutes, including plugging the USB header into the motherboard.

Overall, the process of installing the cooler is still relatively easy but they seem to have followed the age-old adage of “if it’s not broken, fix it until it is” here. Take it back to how it was please.

When we start our installation, the first thing we do is clean off any pre-applied paste and use Noctua’s NT-H1 thermal paste to ensure results are comparable across all of our tests.
We then bolt in the radiator to the top of the chassis, taking care to ensure we mount the fans in such a way that the 4-pin PWM cables are pointing towards the back of the case so they can be routed in the tidiest way possible.
Normally this would be easy and straight-forward but CORSAIR’s engineers seem to have dropped the ball here. The problem we faced was the ridiculous tightness of the screwholes, on both sides of the radiator. Screwing the fans into place required huge amounts of torque applied into screwheads, which for some reason CORSAIR have changed as well. This caused some skipping and jumping when trying to tighten everything up and has chewed the screwheads up slightly. I was honestly under the impression that I was doing something wrong, it was that tight; my right arm was killing me after doing up the 8 screws for the fans and the other 8 for the radiator mounting into the case.
Perhaps they’ve used a stronger aluminium to prevent the threads from getting chewed up if too much torque is applied to the screws, but this just felt wrong to us.
Next up, line up the backplate with the four holes in our LGA 1151 socket and screw in the correct mounting feet. These went in without a hitch and are still the correct size for our multi-bit screwdriver to tighten them up.
Now’s the time to install the pump enclosure. The Intel mounting plate is pre-installed when the cooler arrives but swapping them out for AM4 or TR4 is a doddle. The thumbscrews are easy to do up by hand, to about 70%, but then turning them with a screwdriver isn’t as easy as it should be. Previous iterations of the H-series coolers have used a deeper recess that’s allowed more torque to be applied, and limiting the amount that someone can tighten these isn’t exactly a bad idea but they’ve gone too far here, causing them to slip before they’re fully tightened.
Once that’s installed, doing up the cables behind the motherboard tray takes a couple of minutes, including plugging the USB header into the motherboard.
Overall, the process of installing the cooler is still relatively easy but they seem to have followed the age-old adage of “if it’s not broken, fix it until it is” here. Take it back to how it was please.


