

The installation of the hard drive into the AMMO is straightforward. The rubber is quite flexible. To install, I recommend placing the hard drive into the tray without connecting it to the SATA and power connectors by pushing the hard drive forward against the inner side of rubber. Once the hard drive is inside the rubber tray, place it so that it aligns with the connectors and let it go; the tightness of the rubber tray will push the hard drive into place. For a diagram on how to install the hard drive, take a look at the manual by In Win. It is quite well written:
Link: User Manual of the AMMO
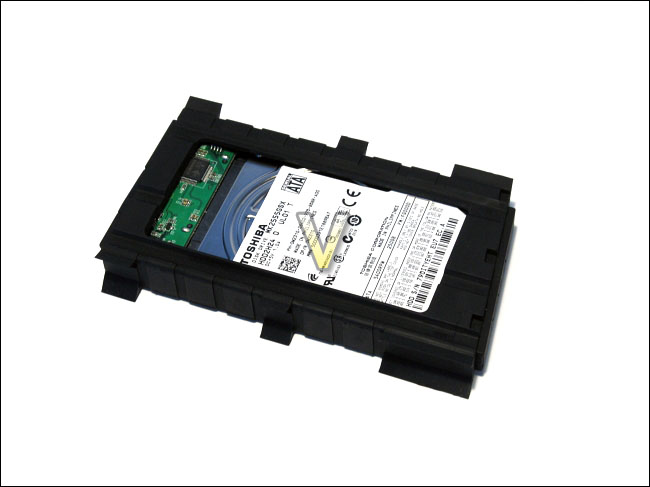
The hard drive installed into the AMMO
At this point, you will need to plug the AMMO into one or two USB ports on your computer with the included USB connector. The reason why the included cable has two male A USB connectors is to ensure that sufficient power is being supplied to the hard drive. Each USB 2.0 port can supply 2.5W. A typical hard drive usually needs about that much to power up, but there are some hard drives that require more than 4W to start. This is where connectors for two USB ports are needed, which can supply up to 5W. It is rare that a hard drive would need more than 5W to start given the fact that most modern 2.5” hard drive are quite energy efficient. Nevertheless, if your hard drive needs more than the power supplied by the USB ports, you will need a 5V DC power supply, which is not included. Once the AMMO is powered, you will see a small blue light at the back of the enclosure.
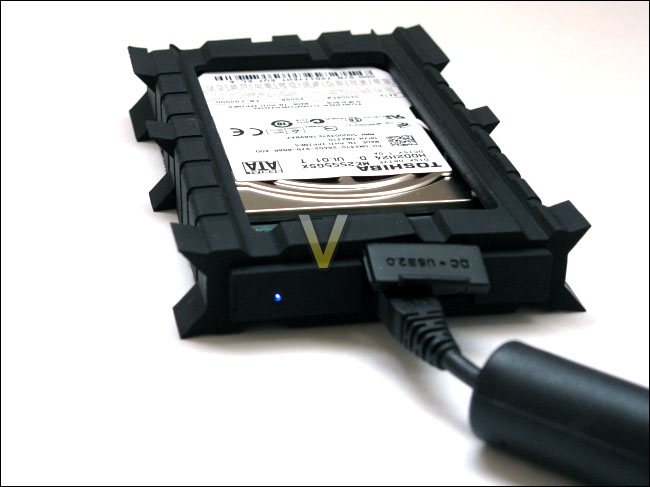
The AMMO plugged and powered
In order to enable the RFID data encryption by the AMMO, you will need to use hard drive with no partitions on it. If there is a partition on the hard drive, the encryption will not be available and the hard drive will be used as normally. Therefore, if you prefer not to use the data encryption of the AMMO, make sure that a partition was created on the hard drive beforehand. In order to setup and format the hard drive for data encryption, you will need to follow In Win’s handy guide:
Link: Hard drive encryption setup
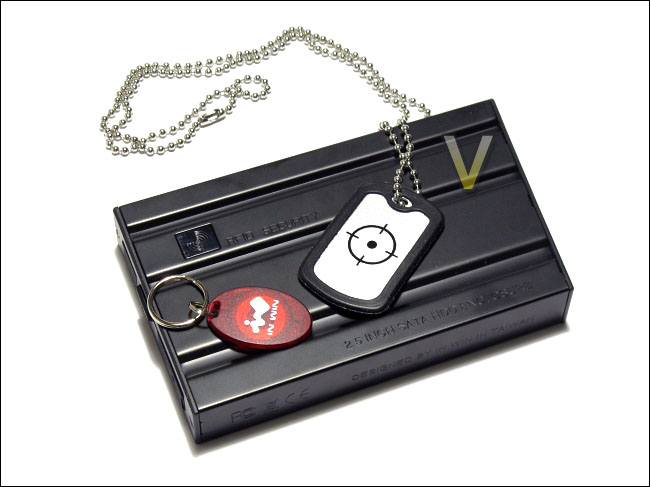
The AMMO and its two RFID tags
Once the hard drive has its partitions deleted using Windows' Disk Management, is installed into the AMMO and is powered, a red LED will glow through the RFID window at the top of the AMMO. Three short beeps and a long beep will be made by the AMMO to indicate that the hard drive is ready for encryption. One of the two RFID tags provided by In Win will have to be placed above the sensor at about 5 mm. Once the authentication was made, the AMMO will beep once and a green LED will glow. The hard drive is now encrypted and the RFID tag is recognized by the AMMO. The second RFID tag provided by In Win will also need to placed over the sensor. Otherwise, only the first RFID tag used during the setup will be able to unlock the AMMO, which was confirmed during testing.
At this point, the hard drive in the AMMO will be detected and accessible through Windows. After initializing the hard drive and creating a partition, any data that you import into the hard drive will be encrypted thereafter.
For those that prefer not to use the data encryption of the AMMO, but still want an alternative method of data encryption, you might look into some free and open-source software, such as TrueCrypt:
Link: TrueCrypt Homepage
Overall, the installation process of the AMMO is simple at the best. Only two screws are needed throughout the process. The rubber tray holds the hard drive snugly and no doubt provides some protection, as well as anti-vibration benefits. The data encryption setup is painless and quick. The only downside of it is that only two RFID tags are provided. In the event that you lose these tags, In Win will not replace them because of security reasons. Also, the data on your hard drive will be lost because it is encrypted with AES (fairly strong encryption). A major inconvenience in the event that you lose your RFID tags, but a plus in security.
Link: User Manual of the AMMO
The hard drive installed into the AMMO
At this point, you will need to plug the AMMO into one or two USB ports on your computer with the included USB connector. The reason why the included cable has two male A USB connectors is to ensure that sufficient power is being supplied to the hard drive. Each USB 2.0 port can supply 2.5W. A typical hard drive usually needs about that much to power up, but there are some hard drives that require more than 4W to start. This is where connectors for two USB ports are needed, which can supply up to 5W. It is rare that a hard drive would need more than 5W to start given the fact that most modern 2.5” hard drive are quite energy efficient. Nevertheless, if your hard drive needs more than the power supplied by the USB ports, you will need a 5V DC power supply, which is not included. Once the AMMO is powered, you will see a small blue light at the back of the enclosure.
The AMMO plugged and powered
In order to enable the RFID data encryption by the AMMO, you will need to use hard drive with no partitions on it. If there is a partition on the hard drive, the encryption will not be available and the hard drive will be used as normally. Therefore, if you prefer not to use the data encryption of the AMMO, make sure that a partition was created on the hard drive beforehand. In order to setup and format the hard drive for data encryption, you will need to follow In Win’s handy guide:
Link: Hard drive encryption setup
The AMMO and its two RFID tags
Once the hard drive has its partitions deleted using Windows' Disk Management, is installed into the AMMO and is powered, a red LED will glow through the RFID window at the top of the AMMO. Three short beeps and a long beep will be made by the AMMO to indicate that the hard drive is ready for encryption. One of the two RFID tags provided by In Win will have to be placed above the sensor at about 5 mm. Once the authentication was made, the AMMO will beep once and a green LED will glow. The hard drive is now encrypted and the RFID tag is recognized by the AMMO. The second RFID tag provided by In Win will also need to placed over the sensor. Otherwise, only the first RFID tag used during the setup will be able to unlock the AMMO, which was confirmed during testing.
At this point, the hard drive in the AMMO will be detected and accessible through Windows. After initializing the hard drive and creating a partition, any data that you import into the hard drive will be encrypted thereafter.
For those that prefer not to use the data encryption of the AMMO, but still want an alternative method of data encryption, you might look into some free and open-source software, such as TrueCrypt:
Link: TrueCrypt Homepage
Overall, the installation process of the AMMO is simple at the best. Only two screws are needed throughout the process. The rubber tray holds the hard drive snugly and no doubt provides some protection, as well as anti-vibration benefits. The data encryption setup is painless and quick. The only downside of it is that only two RFID tags are provided. In the event that you lose these tags, In Win will not replace them because of security reasons. Also, the data on your hard drive will be lost because it is encrypted with AES (fairly strong encryption). A major inconvenience in the event that you lose your RFID tags, but a plus in security.


