
Due to the screwless design within the NZXT Beta Evo, installation is very easy. I only came up against one problem during the installation. This surfaced at the end of the installation when I was putting on the side panels. The side panel wouldn’t actually slide in because the eSATA cable was protruding. There is no indication of this in the manual. So the solution comes by mounting the HDD in the opposite way around so that the cables plug in at the other side, as there is much more space here. Mounting the HDD’s are very easy by the way. All that you are required to do is get two brackets out of the supplied parts box and fit them into the screw holes on the drive and simply slide the disk into the cage.
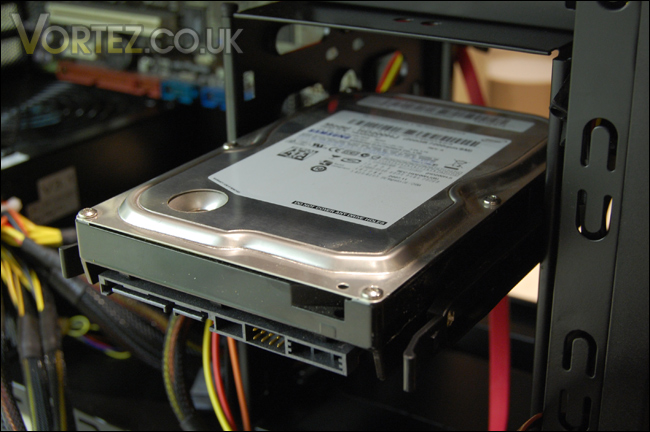
The incorrect way of mounting the HDD
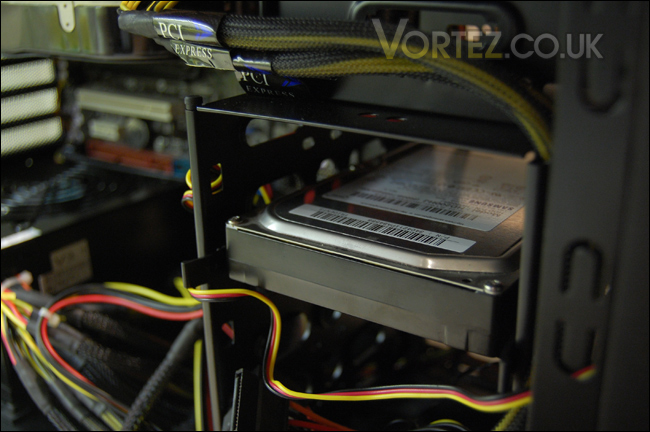
The correct way of mounting the HDD
With 5.25” optical drives, they are mounted in a similar fashion to other cases although with the Beta Evo you are required to remove the front panel completely to pop the cover out. When the drive is in place, you then need to position two locking devices onto either side of the cage area and turn the nob to “close” position and the drive is then secure. (see image). This keeps the drive in place, and it does not move at all.
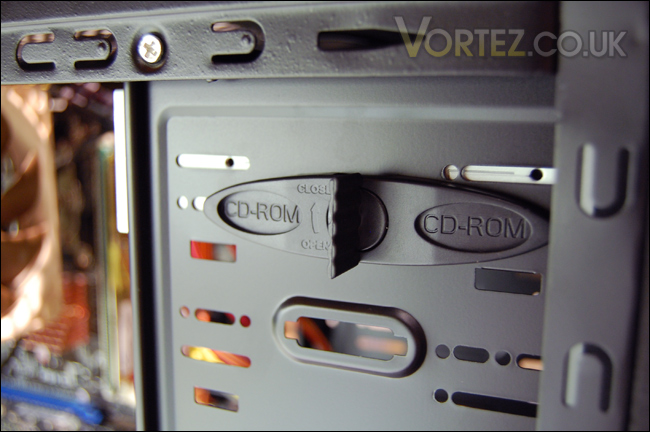
Optical drive locking device
The thing which shines and stands out for me about the Beta Evo is NZXT’s eagerness for cable management. There are plenty of holes and crevasses to hide cables and tuck them away so that you have a nice clean tidy case and one that has positive airflow. As you can see from the images the cables tuck around the back quite nicely and as well as good cable management there is also an opening for access to the motherboard backplate – a feature seen on few cases (and usually very high end, expensive ones). It’s brilliant to see that NZXT have taken all these features into account, it makes installations, upgrades and general usage easy and hassle free.
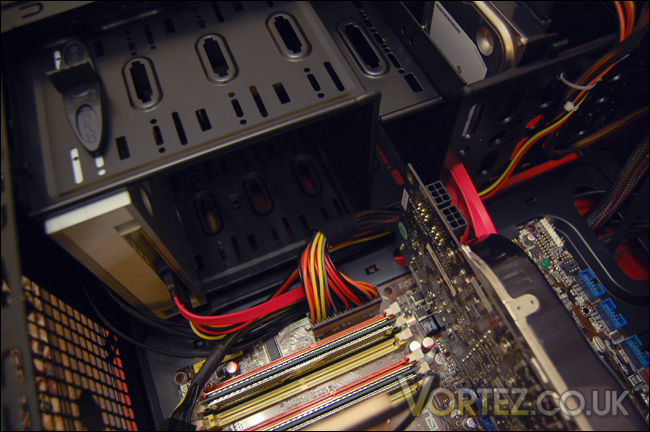
As you can see, cable management is very easy - and effective
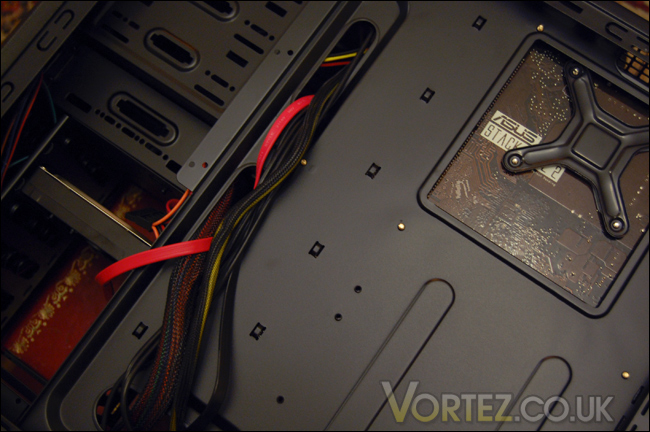
The backside of the motherboard tray, with the cut out for the backplate
Finally I thought it would be advantageous to mount a Noctua NF-S12B on the side of the side panel – positioned precisely above the GPU so that any heat dissipated can be flushed outside of the case as soon as possible.
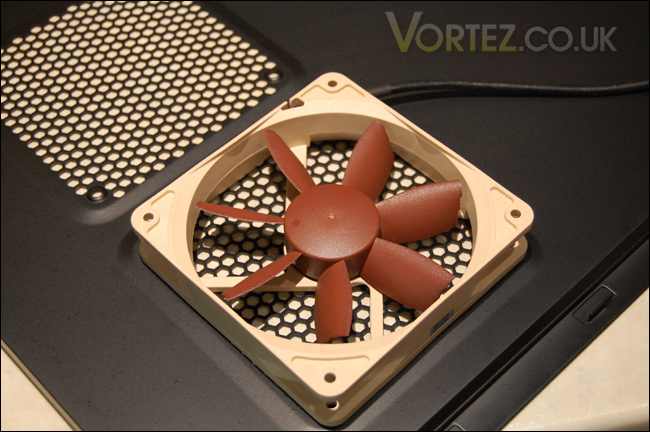
Mounting a Noctua NF-S12B to the side panel to ease heat off the GPU
You will also see from the image that I mounted another Noctua in the space provided for a rear exhaust fan. Coupled with the front fan, and side panel fan this setup should have great airflow. With the setup now complete we can see how the NZXT performs temperature wise. But before we do this, I thought I might mention that in this installation I fitted the rather long Nvidia 8800GTX and it had at least two inches before it came into contact with anything. So to host any card around 10 and a half inches long will fit inside this case with no problems.
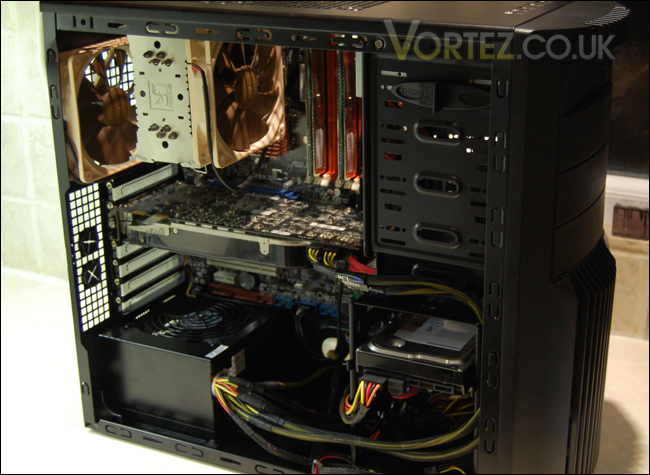
Full system installed. Easily accomodating the likes of the 8800GTX
The incorrect way of mounting the HDD
The correct way of mounting the HDD
With 5.25” optical drives, they are mounted in a similar fashion to other cases although with the Beta Evo you are required to remove the front panel completely to pop the cover out. When the drive is in place, you then need to position two locking devices onto either side of the cage area and turn the nob to “close” position and the drive is then secure. (see image). This keeps the drive in place, and it does not move at all.
Optical drive locking device
The thing which shines and stands out for me about the Beta Evo is NZXT’s eagerness for cable management. There are plenty of holes and crevasses to hide cables and tuck them away so that you have a nice clean tidy case and one that has positive airflow. As you can see from the images the cables tuck around the back quite nicely and as well as good cable management there is also an opening for access to the motherboard backplate – a feature seen on few cases (and usually very high end, expensive ones). It’s brilliant to see that NZXT have taken all these features into account, it makes installations, upgrades and general usage easy and hassle free.
As you can see, cable management is very easy - and effective
The backside of the motherboard tray, with the cut out for the backplate
Finally I thought it would be advantageous to mount a Noctua NF-S12B on the side of the side panel – positioned precisely above the GPU so that any heat dissipated can be flushed outside of the case as soon as possible.
Mounting a Noctua NF-S12B to the side panel to ease heat off the GPU
You will also see from the image that I mounted another Noctua in the space provided for a rear exhaust fan. Coupled with the front fan, and side panel fan this setup should have great airflow. With the setup now complete we can see how the NZXT performs temperature wise. But before we do this, I thought I might mention that in this installation I fitted the rather long Nvidia 8800GTX and it had at least two inches before it came into contact with anything. So to host any card around 10 and a half inches long will fit inside this case with no problems.
Full system installed. Easily accomodating the likes of the 8800GTX


