
The installation method is very easy but it's a shame that the provided bundle only caters to Intel users, especially when other coolers have built in support for all recent sockets from both Intel and AMD. The Ultimate CPU Cooling Solutions! USA can be purchased separately. More information about the installation and the contents can be found on Thermalright's website for both Intel and AMD setups.
Installation
1.
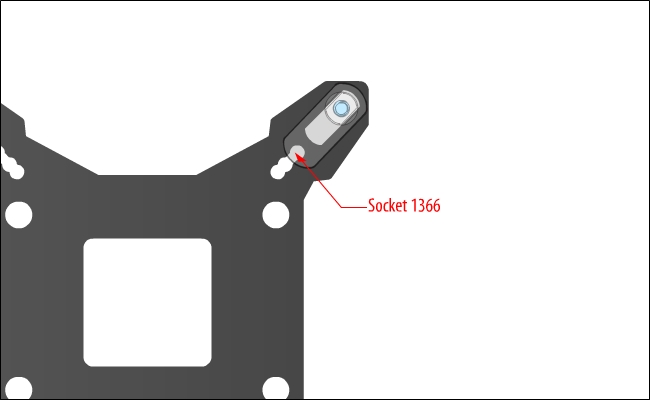
Installation is a very straight forward process. Firstly, set the notch to the appropriate socket type. The inner most notch is for LGA775 sockets and going progressively outwards, there is the LGA1156 notch and then the LGA1366 one. A simple slide is all that's required.
2.
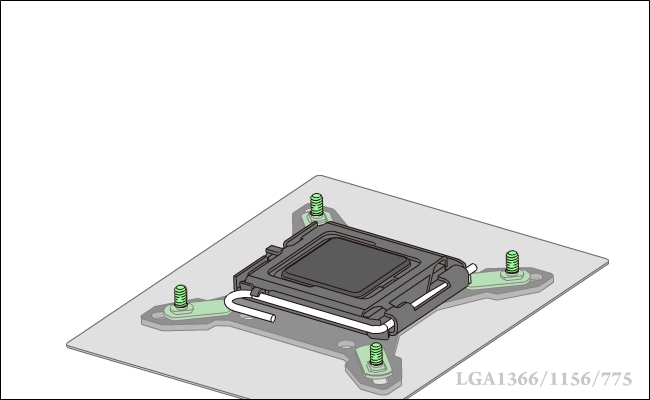
Place the backplate below the motherboard and if you have a LGA775 motherboard, don't foget to install the backplate cap first.
3.
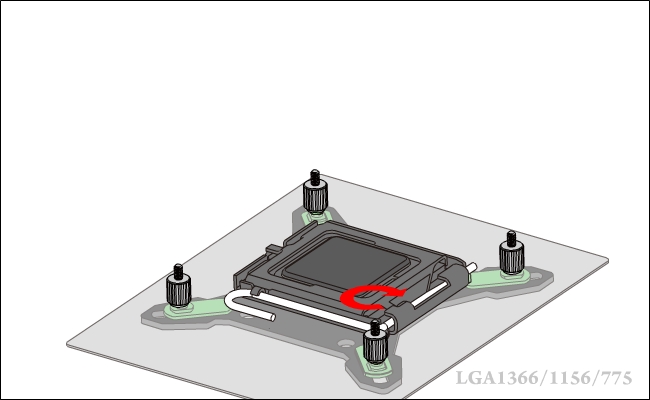
Install the screw pillars so that the backplate is fixed.
4.
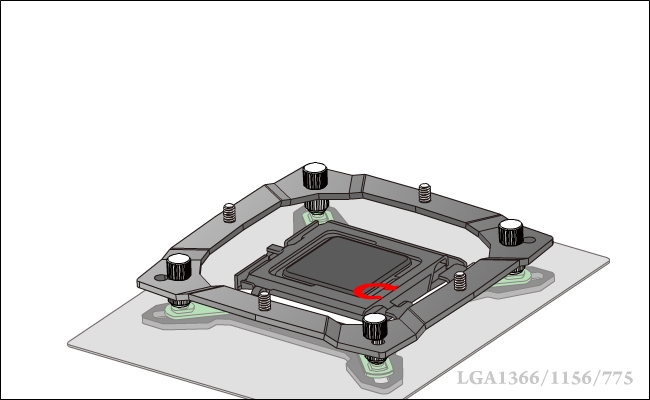
Place the anchoring mounting bracket on top and use the thumbscrews to tighten it down.
5.
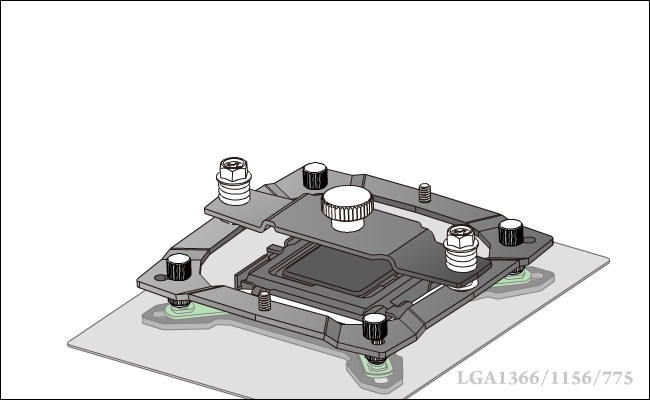
Place the heatsink in the desired orientation and use the pressure adjustable mounting plate to keep it secure. Only tighten the two screws until they naturally stop. The wrench can be used for this process but a screwdriver will work more effectively if you're installing it inside a case. To tighten the bracket system, you can add pressure through the middle screw. It is set to 40lbs at default but turning it clockwise applies more pressure. This system may prove useful for people who end up lapping the base without needing washers, since the new mounting system can no longer make use of them to fill in gaps.
Installation
1.
Installation is a very straight forward process. Firstly, set the notch to the appropriate socket type. The inner most notch is for LGA775 sockets and going progressively outwards, there is the LGA1156 notch and then the LGA1366 one. A simple slide is all that's required.
2.
Place the backplate below the motherboard and if you have a LGA775 motherboard, don't foget to install the backplate cap first.
3.
Install the screw pillars so that the backplate is fixed.
4.
Place the anchoring mounting bracket on top and use the thumbscrews to tighten it down.
5.
Place the heatsink in the desired orientation and use the pressure adjustable mounting plate to keep it secure. Only tighten the two screws until they naturally stop. The wrench can be used for this process but a screwdriver will work more effectively if you're installing it inside a case. To tighten the bracket system, you can add pressure through the middle screw. It is set to 40lbs at default but turning it clockwise applies more pressure. This system may prove useful for people who end up lapping the base without needing washers, since the new mounting system can no longer make use of them to fill in gaps.


